- Mik Bromley

- Oct 6, 2025
- 9 min read
Updated: Oct 8, 2025
ℹ️ - Ghost of Yotei: Photo Mode Explained
Developer: Sucker Punch Productions
Publisher: Sony Interactive Entertainment
Platform: PS5
Initial Release: 2nd October 2025
Digital copy provided for PS5 by Sony Interactive Entertainment
It may be more than 300 years later and the tale of Jin Sakai now something of legend, but Sucker Punch's Tsushima follow-up certainly continues the Ghost mythology. Atsu's story of vengeance brings back the razor-sharp combat and exists in an even more beautiful rendition of traditional Japan.
The picturesque landscapes and authentic cultural beauty of Yōtei make it another ideal virtual photography playground then, and the studio's elegant photo mode makes a return to let you take advantage. With a UI that is more artistic than descriptive, you may be left wondering how certain things work, so here is my guide to every photo mode feature in Ghost of Yōtei, explained from a photographer's perspective.

Camera
Camera Movement:
After jumping into the photo mode via the convenient D-Pad shortcut, the first thing to understand is the camera movement and it might surprise you to hear that it is technically an orbit camera. Don't worry though, Sucker Punch have a solution here that avoids the usual limitations of that and makes it behave mostly like a freecam.
Although the camera does rotate around a central pivot point using the RS, that point is not fixed to the character and can be moved freely around in any direction using the LS and L2 / R2 triggers. The range is fairly modest, but there is a glitch that can break free of the camera's confines by quickly leaving and re-entering the photo mode several times while pushing it to the maximum distance for much greater freedom.
There are telltale signs of the orbital mode though, like a shift in perspective with small lateral adjustments or when composing a close-up portrait. Notice how the camera swings around the subject rather than just panning, although that can sometimes be handy to explore portrait angles. On the subject of which, a full 360° roll is found on the UI for when you want to grab shots in portrait orientation.
Tracking Shot:
Easily the most advance camera movement here is one that actually appears right at the top of the UI list. Rather than still images, this is all about moving sequences and lets you set up an automated path for the camera to follow.
To do this, simply move the camera to a desired starting position and press X to record it as a tracking point. Now move the camera somewhere else, press X again to add another point, and then press △ to preview the animation as the camera moves from one point to the next.
A total of 16 tracking points can be added and each of these can have their own focal length and manual focus distance to adjust the shot on the fly. Crucially, the distance between each point determines the camera's movement speed so you'll need to keep them close together for slow and smooth motion.
TIP: remember to reset the tracking points with ☐ for when you want to hide the UI for a still image again...
Focal Length:
Of course, there's more to the camera than movement and the Focal Length range of 12 – 300 mm takes care of the field of view with a lengthy zoom. Short focal lengths like 12 – 28 mm offer a wide viewing angle that is useful to take in a broad scene or to create some perspective distortion.
A middling range of 50 – 85 mm is great for portraits and achieves more separation of the subject from the background while maintaining a fairly natural look, while longer lengths of 150 mm or more create a telephoto effect. Long zooms like this compress the scene, making the perceived distance between the foreground and background much shorter and bringing distant objects into the frame.
Depth of Field:
Disabled by default, the depth of field setting controls how much of the scene appears in sharp focus and how much is rendered with defocused blur. The use of aperture f-stop values means that larger numbers keep more of the scene in acceptable focus while smaller numbers create a shallow depth of field with more blur and bokeh on both the background and foreground.
Note also that the depth of field effect is more pronounced at longer focal lengths and shorter distances to the subject. This is an authentic optical effect and one to keep in mind when composing your shots.

Focus Distance:
Depth of field is no use without focusing the camera and a Focus Distance lets you do that manually with reasonable accuracy at distance from just 10 cm to 200 m. The minimum steps are also 10 cm, so fine tuning with the dolly focus technique – i.e. by moving the camera forwards / backwards slightly – can be a useful trick to get the point of sharp focus exactly where you want it.

There's also an auto-focus option, triggered by pressing ☐ when on the Focus Distance setting. This locks the camera's focus onto Atsu and automatically adjusts as the camera is moved around. This comes in pretty handy a lot of the time but be aware that the plane of focus is on the centreline of the character model and not on the eyes or face.
Image Processing
Moving down the UI menu list – and I'm afraid you're just going to have to put up with the overly dramatic sound effects that this now has – the next things we come to are some options to adjust the look and feel of the image.
Colour Grading:
A selection of 10 preset colour grading filters includes black & white, vivid, and single-colour styles that can enhance certain colours or apply an overlay of artificial tones. As was the case in Ghost of Tsushima, these unfortunately don't include the cinema-inspired Kurosawa mode. You'll have to activate that from the main game display settings, just be aware that doing so will disable the standard colour grading options.

Colour Grading Intensity:
For the filters that are part of the photo mode, a simple intensity option controls how strongly they are applied. At 100%, each colour grading style will completely replace the default game colours, while lowering the intensity will blend the styles for a more subtle effect. These can also usefully overwrite full-screen effects like the red tint when on low health.
Exposure Bias:
Much like the exposure compensation function on a camera, the Exposure Bias setting here can be used to adjust the overall brightness of the image. This affects all areas equally, so highlights, midtones, and shadows are all shifted to brighter or darker levels. With a range of ±5 to play with, there's enough to dramatically over or underexpose the shot.

Contrast (Black / White):
Adding further tweaks to the luminosity, Contrast changes the difference in brightness between the highlights and the shadows by directly affecting the black and white levels. Low contrast values subdue the blacks and whites to push everything towards grey, while high values exaggerate the difference with brighter whites and darker blacks. This seems to be a bit too strong an effect for me, so it's best used sparingly.
Dynamic Effects
Much like the island of Tsushima, the lands surrounding Mount Yōtei are a dynamic place with winds, weather, and foliage that help bring it to life. The photo mode includes several options to use these, both for still and moving pictures.

Particles:
With Animated Environment turned on, a number of different particle effects can be summoned to fill the air with the game's iconic falling leaves, as well as the likes of floating embers and fireflies. There are 16 to choose from and it's well worth noticing that the leaves & particles don't just float around but actually accumulate on the ground too.
Particle Intensity:
Whether it's leaves, insects or birds, the particles can be overwhelming by default, so the intensity setting lets you reduce their abundance for something more subtle.

Wind Speed:
The wind plays a big part in the game and is also important in the photo mode. Wind Speed does exactly as you might expect by varying the strength of the wind as it blows through the scene and includes anything from no wind at all to very strong gusts. Notice how it affects not only floating particles and smoke, but grass, tree branches, and the character's hair and clothing too.
Wind Direction:
Particularly useful in that last respect, Wind Direction will change which way the wind is blowing, and hence exactly how it affects flowing objects. The 360° scale gives excellent control over how the wind moves across the frame, though there is nothing to indicate which direction each angle faces, so it's just a matter of watching the results.

Clouds:
Definitely not affected by the wind, the rendered cloud coverage is nonetheless dynamic. There's no directional choice here beyond forwards and backwards, but scrolling through the slider gives a seemingly endless cycle of changing cloud formations that can be controlled while the UI is hidden. It's not actually endless and offers 5,000 clicks in each direction, or I suppose 10,000 if you have enough patience to start at one end.
Time of Day:
With a full day cycle from 12:00 AM to 11:59 PM, the day / night transition beautifully demonstrates the changing lighting conditions in the game. Only the main daytime period has movement of the sun across the sky though, so that's the region to use if you are hoping to change the lighting direction.
Sunrise and sunset meanwhile, have a fairly abrupt transition to some lovely orange hues, and the moon stays fixed in place overnight.

Weather:
Arguably more powerful than time of day, the photo mode also includes the ability to toggle between any of the 8 different weather conditions. These include beautiful sunshine, dense fog, and spectacular lighting storms that it is possible to capture every time by toggling the animation on & off.
Oh, and there is also now an aurora weather option to show the aurora borealis on a clear night sky, but that is found in the Particles list for some reason.

Animated Environment:
Enable or disable the animated environment effects while in the photo mode.
Character
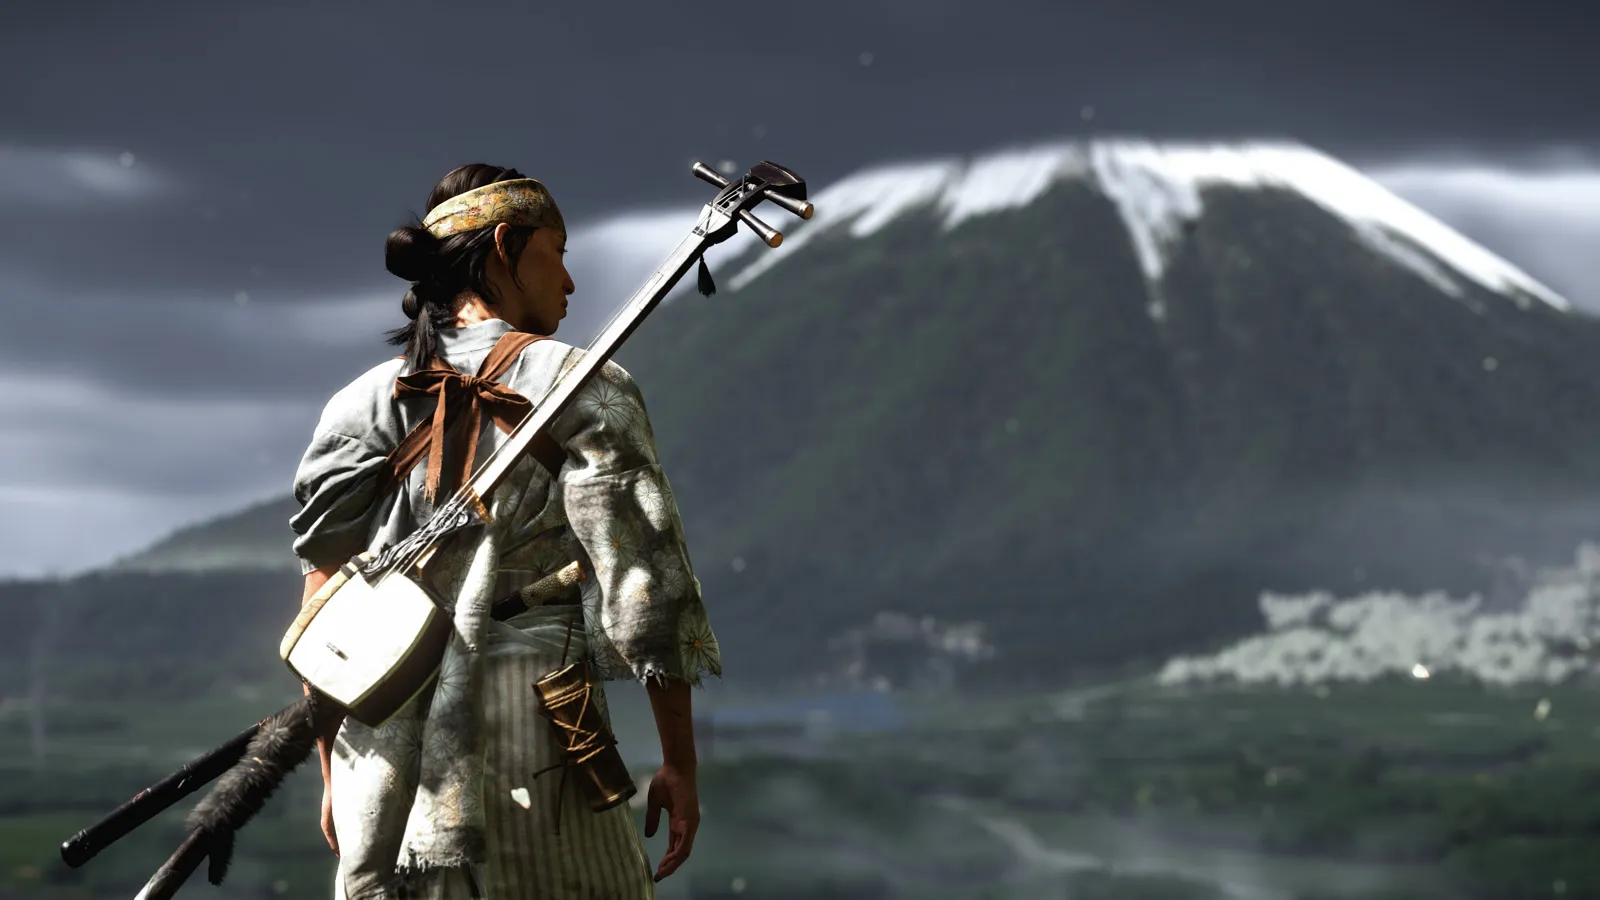
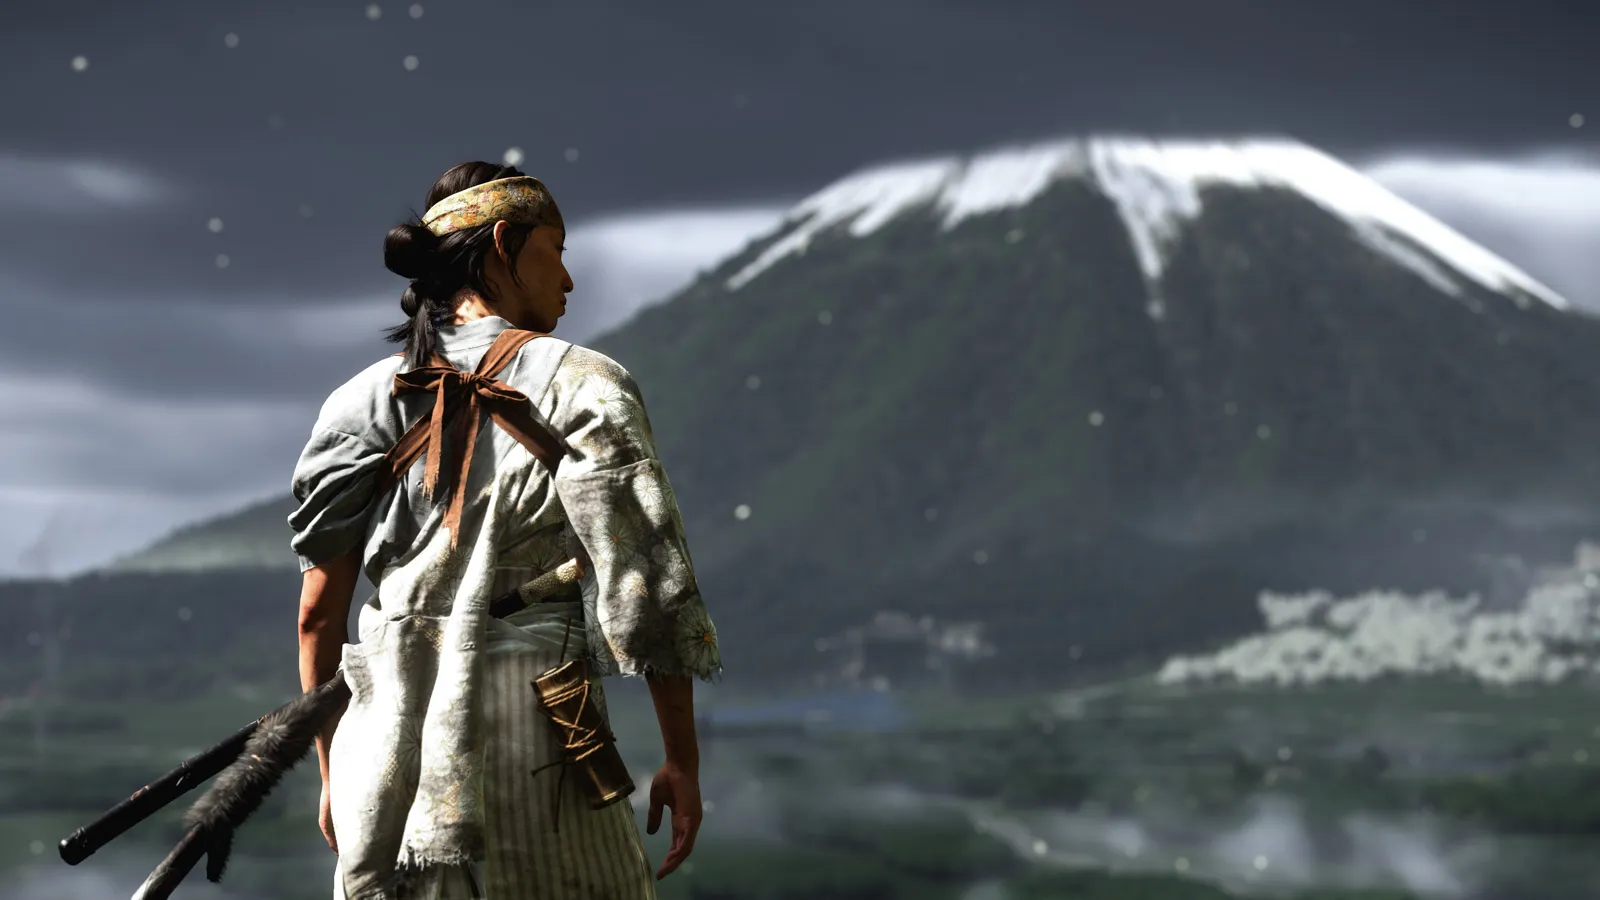
Atsu:
The first of a handful of settings that affect Atsu is this basic ability to show / hide her character model entirely, or to add a texture overlay. There are just two to choose from with the options being Muddy and Bloody, though they are an effective way of dirtying an otherwise pristine outfit or armour set.
Atsu Emotions:
Despite the lack of full body poses for Atsu, there are 16 different facial expressions for her. As was the case with Jin the last time around, these are not the most emotive and suffer from vacant eyes that stare straight ahead and leave Atsu looking disengaged a lot of the time.

Helmet / Mask:
It's likely that you might have a mask equipped quite often while playing and while they can look excellent in the photo mode, there may be times when you'd rather see Atsu's face. This simple option to show / hide any hat, helmet, or mask does exactly that.
Sadly not part of the photo mode, but there is a similar option found in the game settings to hide Atsu's secondary weapon or musical instrument on her back for the ultimate clean look.
Sword Glint:
In contrast to making weapons hidden, Sword Glint is intended to emphasise the finely honed blade of a katana with an eye-catching reflection of light. Another clear inspiration from cinema, increasing the value here boosts the amount of light seen to be reflected to draw the viewer's attention to the weapon without fail.

Aspect Ratio:
Another way to lean into a cinematic look for your shots is by changing the aspect ratio. 16:9 is the standard widescreen tv layout, while 21:9 and 32:9 give a more CinemaScope or ultra-wide feel. These are just pixel crops though, so don't expect a widened field of view or any other anamorphic lens characteristics, it's just about composing a shot within a wider frame.
Stamp:
Stamps are one of the most artistic features in the Ghost of Yōtei photo mode and the 20 preset styles are much more attractive than standard logos. The ink-like designs and partial overlays can make a nice accompaniment to the right underlying image.

Music:
Music may be the last thing on the photo mode UI and is obviously meant more for short video clips than photos, but it is sometimes the first thing I do before taking a shot. Why compose in silence when you can play one of the stirring soundtracks for a little added inspiration.
Other Features:
A couple of final features to be aware of relate to how to reset, or indeed save your chosen settings. Each setting can be reset individually by pressing ☐, with a second press of the button then going on to reset all settings. The latter does come with a confirmation prompt, so it isn't too easy to accidentally wipe everything.
Exiting the photo mode will ordinarily see all settings reset to their default values, but not always. As long as you don't move the character more than a couple of metres, the photo mode will actually retain all of the previous settings including focal length, colour grading, and even camera position. Perfect for when you want to take a series of similar shots, or if you just need to adjust a stance slightly without having to start over.
That's everything you need to know about the photo mode in Ghost of Yōtei then – and Ghost of Tsushima for that matter seeing as they are virtually identical for now.
Controller Layout


Subscribe to the regular newsletter for all the latest features from TheFourthFocus.com


The photo mode guide is incredibly thorough — especially the tracking shot feature with 16 points. I've bookmarked it and even used a text to pdf converter to keep a local copy for quick reference. One minor gripe: the UI sound effects are too dramatic and distracting. Still, the depth of field and particle controls make it a powerful tool for virtual photography. Well done!
Ghost of Yotei’s Photo Mode adds a creative layer to the gameplay, letting players capture cinematic shots with detailed control over lighting, angles, and atmosphere. It’s a great feature for those who enjoy turning in-game moments into visual storytelling.
For businesses or creators looking to invest in tools, equipment, or creative projects without putting pressure on cash flow, flexible funding options like business loans ireland can help manage expenses more smoothly.
Overall, it shows how creativity and smart financial planning often go hand in hand, whether in gaming or real-world projects.
One thing that makes modern entertainment so engaging is how interactive experiences keep evolving. Features like advanced graphics customization and creative camera controls have changed the way people enjoy gaming today. Interestingly discussions around titles like Ghost of Yotei and topics such as “Photo Mode Explained” often highlight how players now pay closer attention to detail balance and immersion. Whether it is adjusting visual settings exploring landscapes or capturing perfect in-game moments people naturally become more aware of how small adjustments can improve the overall experience.
This idea of making thoughtful adjustments also connects to everyday lifestyle habits outside gaming. In the same way players experiment with settings for better performance many individuals today are learning how daily routines especially…
Interesting breakdown of Ghost of Yotei’s photo mode. The attention to visual detail and how players can capture cinematic moments really adds another layer to the experience, especially for those who enjoy in-game photography.
I also came across similar gaming and culture-related coverage on the irish insider which explores a mix of entertainment and digital trends in a clean, easy-to-follow way.
Interesting breakdown of the Photo Mode in Ghost of Yotei. It’s always impressive how modern games are putting so much effort into visual storytelling tools like this, especially for players who enjoy capturing cinematic shots.
On a different note, I recently came across some useful insights on how strong visuals and layout play a big role in digital experiences beyond gaming too, especially in areas like web design dublin. The overlap between immersive design in games and user-focused website design is actually pretty interesting when you think about it.
Looking forward to seeing more features like this being explored in future games.