- Mik Bromley

- Apr 12, 2024
- 5 min read
Updated: May 5, 2024
ℹ️ - Rise of the Rōnin Lighting Guide
Developer: Team Ninja
Publisher: Sony Interactive Entertainment
Platform: PS5
Initial Release: 22nd March 2024
Rise of the Rōnin has an excellent photo mode with some great features like frame-by-frame animation, character gaze direction, and of course, a full 3-point lighting setup. It's a setup that is actually pretty straightforward to use, although there are a couple of things that behave differently to how you might expect.
Here then, is everything you need to know to make proper use of those lights while capturing photo mode shots in 19th century Japan.

"The lights are very useful, though there are a couple of pretty major limitations that do hold them back..."
Light Placement
Adding lights into the scene is very easy and is done straight from the third tab of the photo mode UI. Simply choose light number 1, 2, or 3 and turn it on using the toggle switch. You should notice some additional light falling on your character, as well as any nearby surroundings, from the newly activated light source.
By default, each light is first placed directly above the character's head, as though they are standing underneath a ceiling light. This is obviously not where we want the lights to be all of the time, so to move them around, just enter the Adjust Position settings.
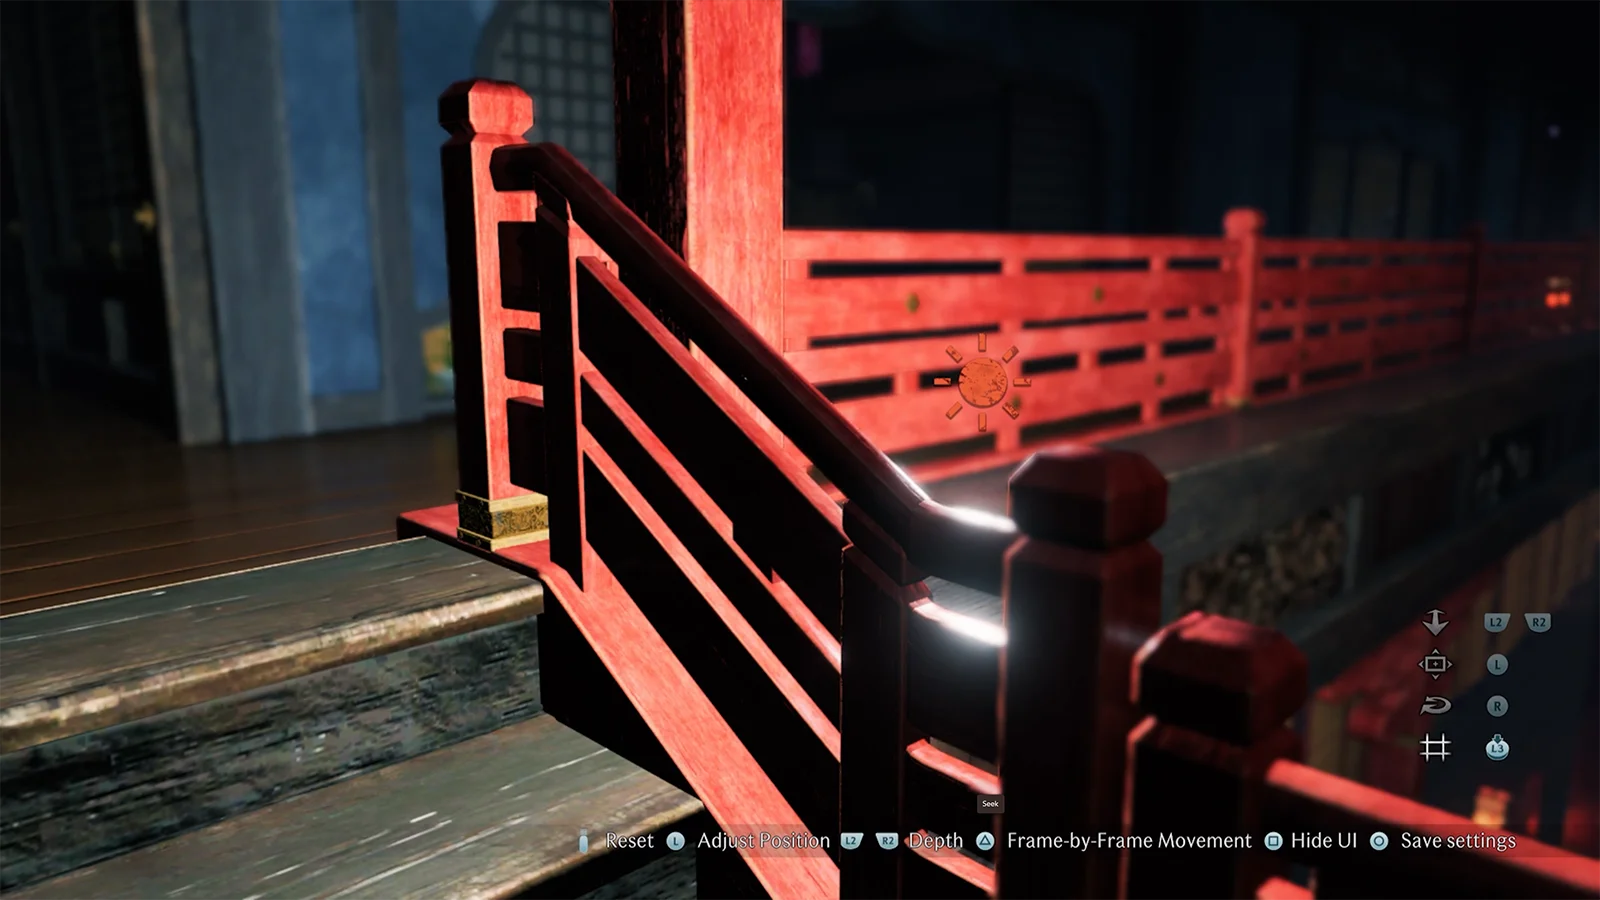
The main photo mode UI will disappear for a clearer view, and the selected light source is shown by a small, orange sun icon. This can be freely moved around to reposition the light using the LS to move it up, down, left, and right, while the L2 / R2 triggers will bring the light closer to the camera or push it further away.
It's worth noting that the lights can pass straight through solid objects in the game environment and will still show the icon through them, while the range of movement is also quite large. Much greater than that of the photo mode camera in fact, so it is easily possible to move a light off-screen and out of view.
A wider camera angle can be useful to get a better overview when first placing lights and if you do manage to completely lose track of one, just remember that a press of the Options button will reset it back to the starting location.

Light Intensity
As always, the brightness of your additional light sources will greatly affect how well it illuminates the subject and ultimately, the quality of your photography. If a light is too bright, it will easily overwhelm the details with blown out highlights, but if it is too dim then you may struggle to see its effects at all.
Thankfully, each of the 3 separate photo mode lights has its own brightness control to adjust their individual intensities. Use this to create harsh lighting or a defined rim light with more intense, bright lights, or something a little more delicate with a dimmer one.
One other thing you might notice while playing around with this is that the brightness also affects the distance that the light shines. The brighter they are, the further they shine and vice versa. With no other control over the casting distance, it means that dimmer lights will need to be kept close by to be useful and bright lights may need dialling down or repositioning to avoid casting unwanted light on other surfaces.
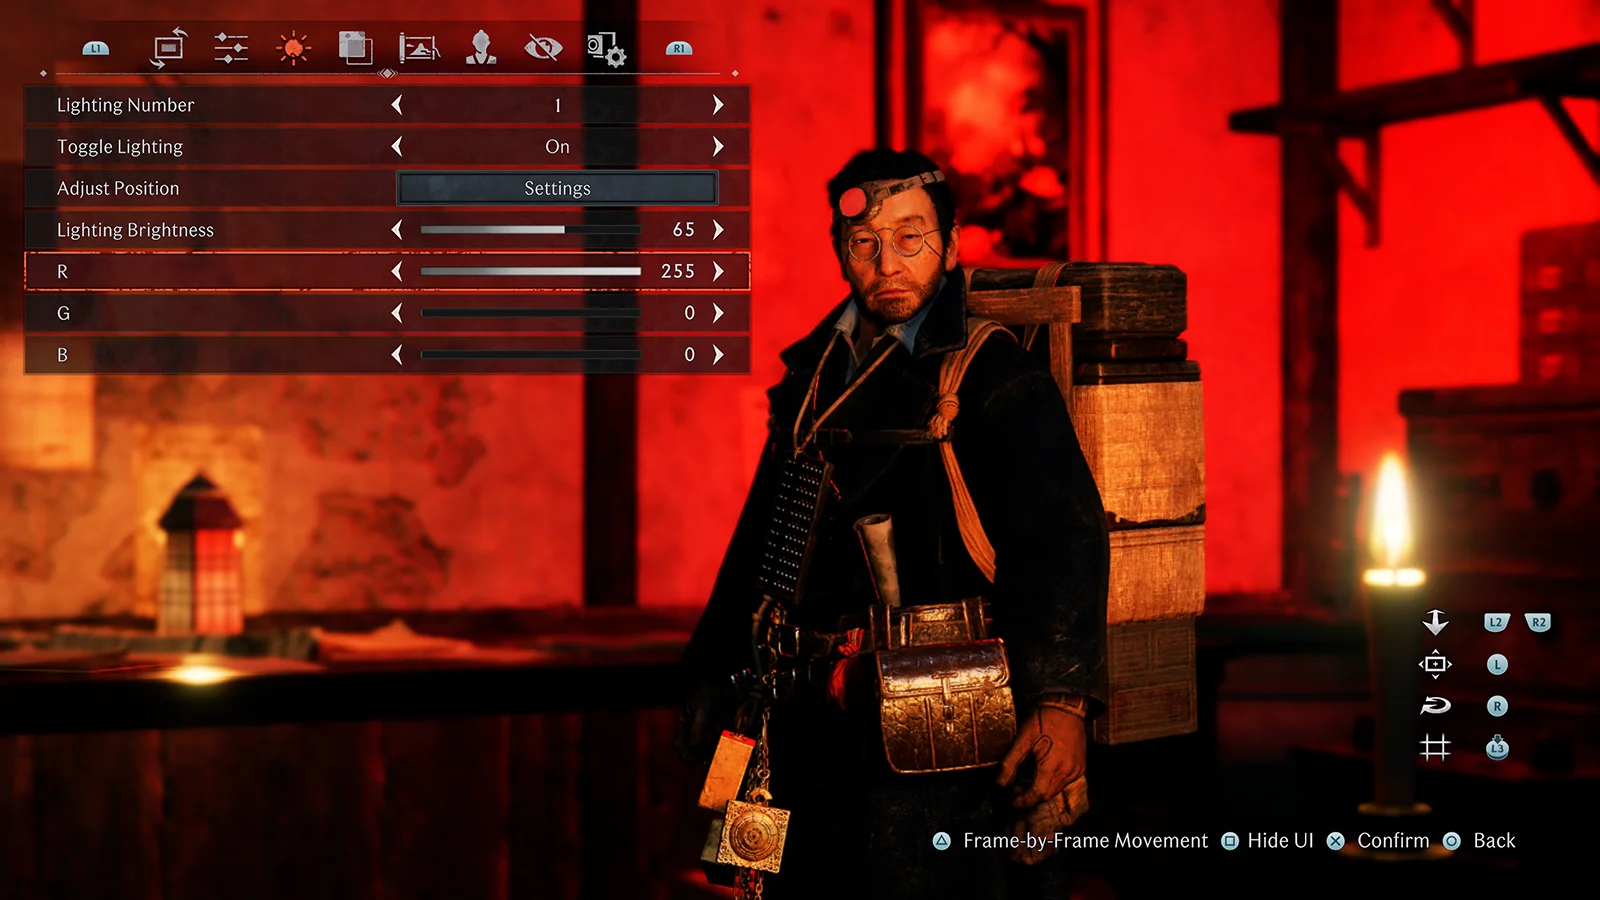
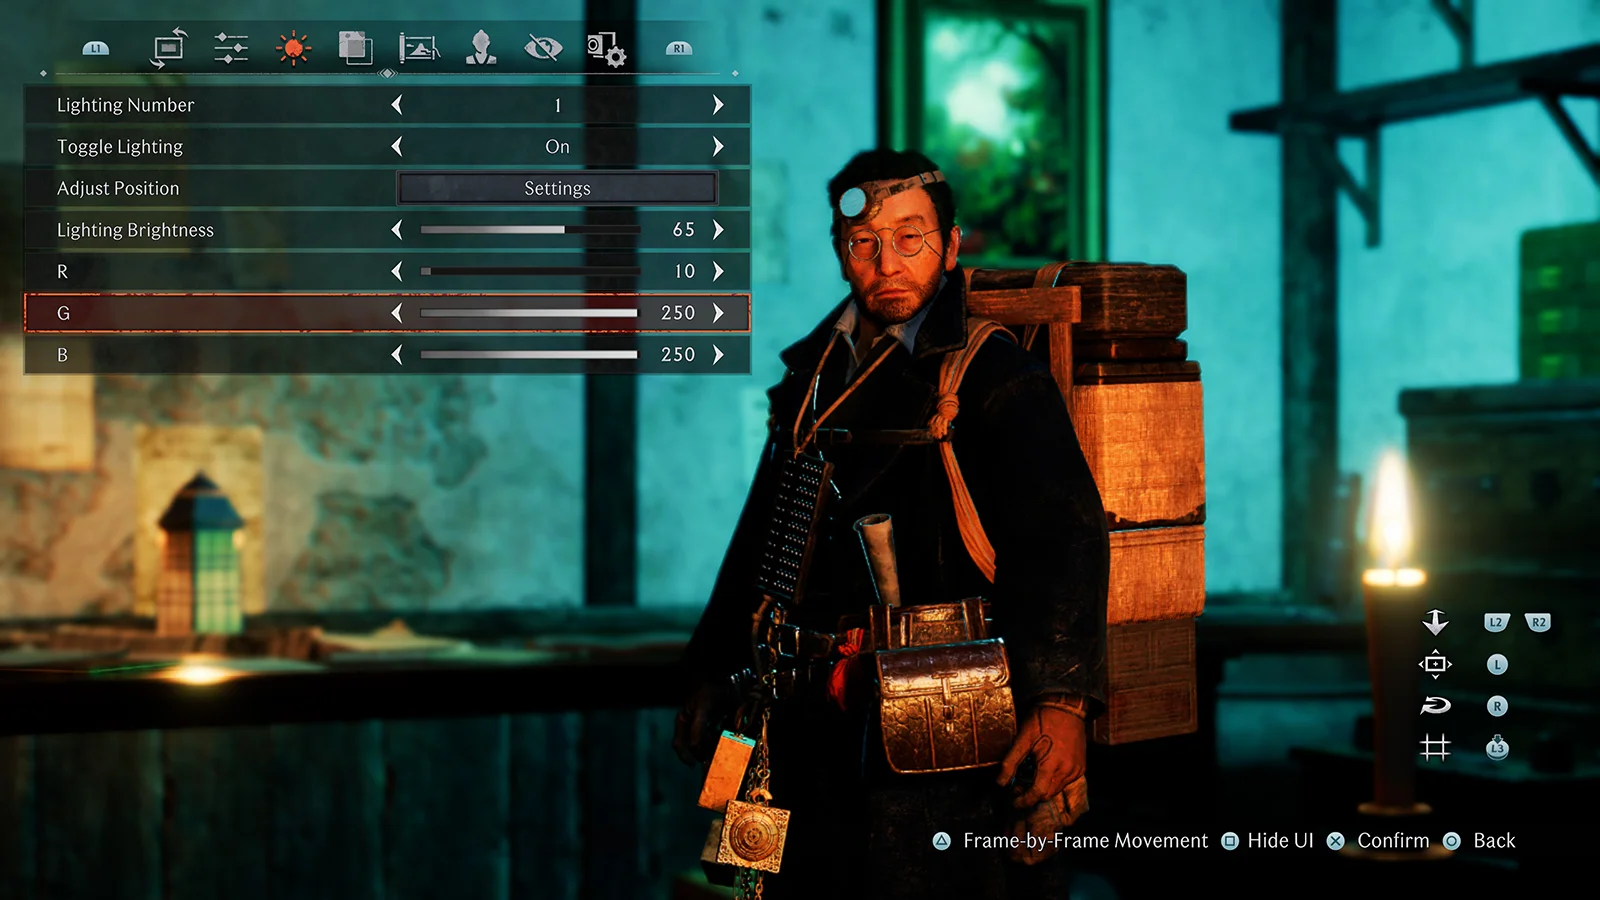
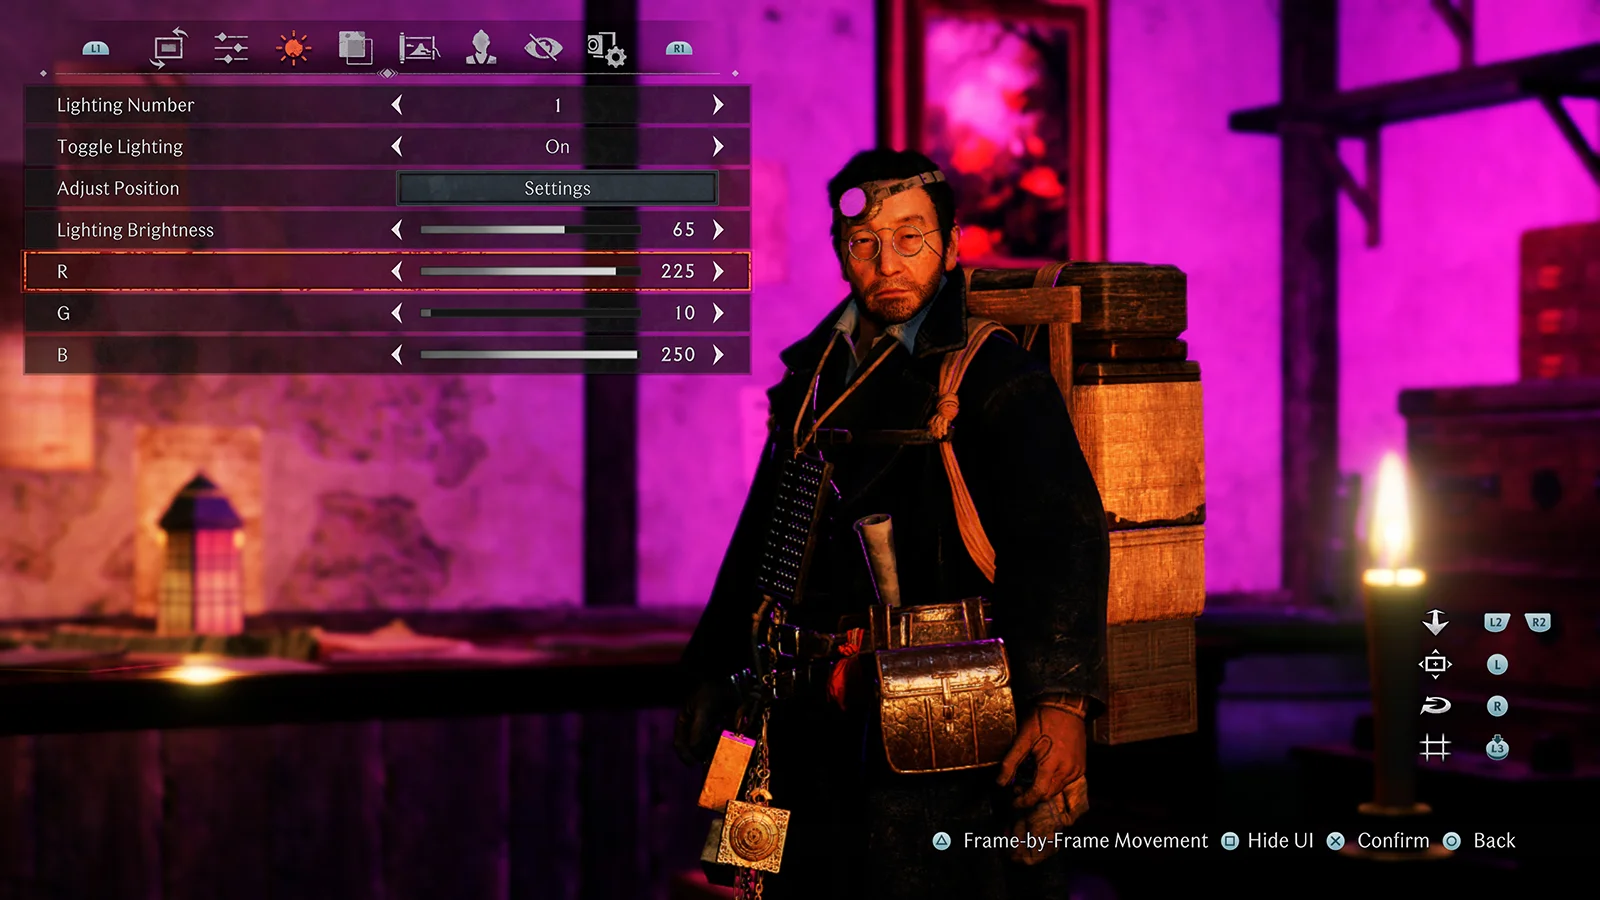
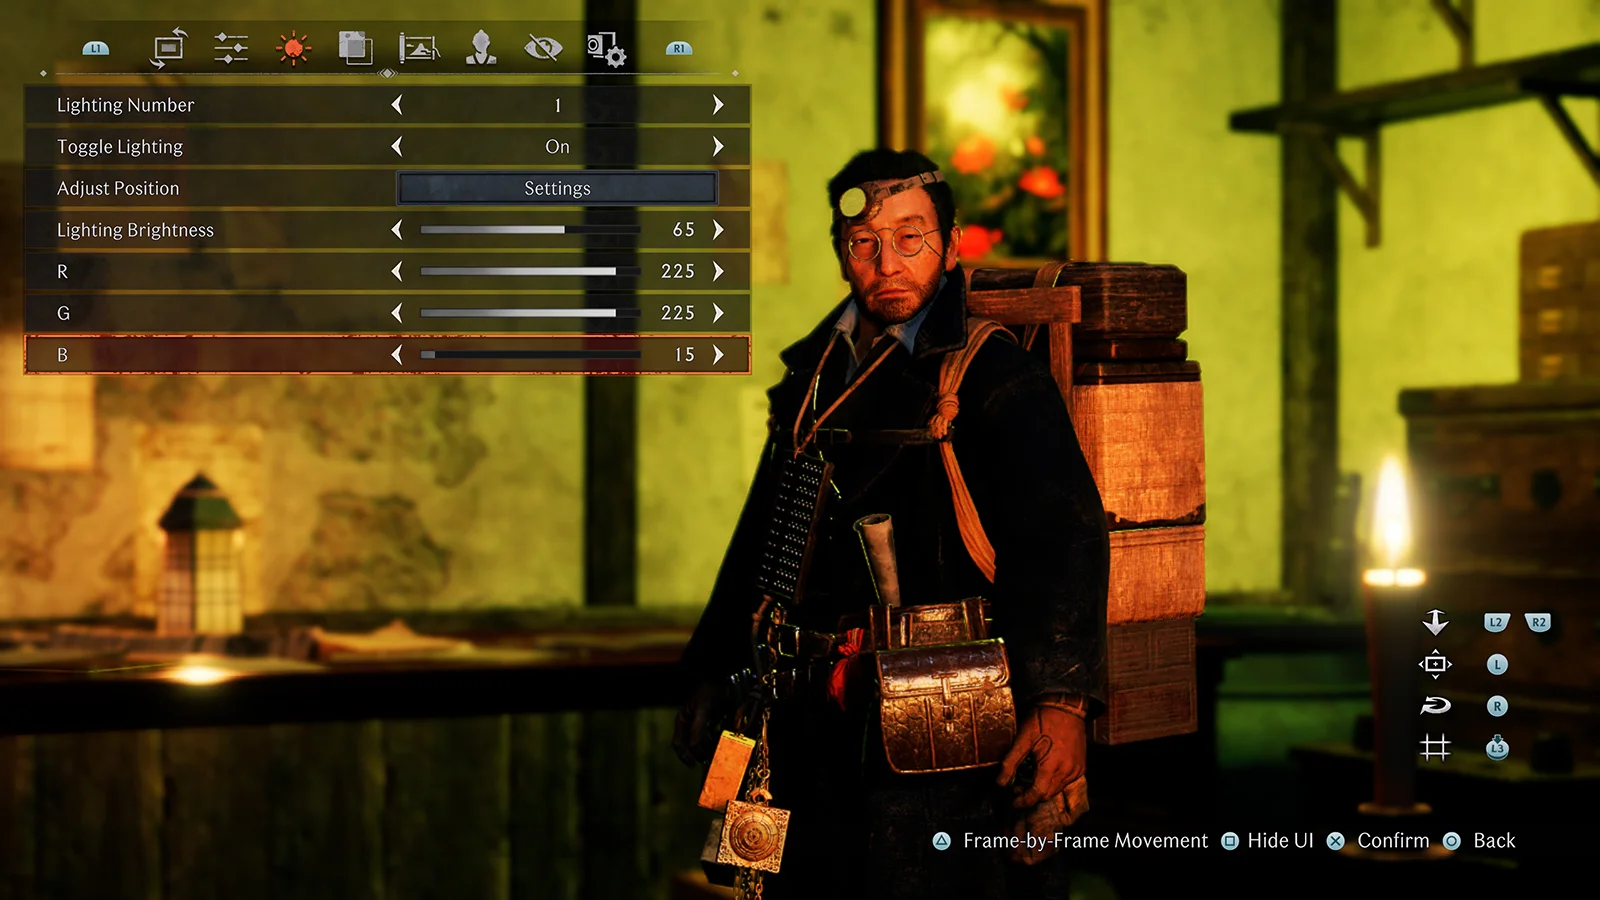
Light Colour
Right below the brightness option are three colour sliders to change the individual hue of the 3 available lights. This full RGB control can be used to set the colour to – as the name suggests – red, green, or blue, as well as any colour in between by blending them together.
Setting all three values to the maximum of 255 will get it back to plain white, while values of 0 will give you no light at all. It's really versatile and lets you play around with different coloured effects, or just to match and enhance in-game light sources.
One thing I really can't explain is quite why it has to take soooo long to adjust these settings. Seriously, it takes 17.5 seconds (yes, I did time it) for each slider to travel from one end to another, so changing one light from red to blue for example will cost you well over half a minute! That might not sound like a lot on the grand scheme of things, but it's more than enough to get annoying when you just want to try different styles.
I do at least have a little tip to help here if you regularly use lights of a certain colour. Just head over to the final tab and press the Save Settings option. This will save the current photo mode settings, including the RGB colours of the 3 lights, and start with those values each time you re-open the photo mode.

The Limitations
The lights in Rise of the Rōnin are very useful, obviously, though there are a couple of pretty major limitations that do hold them back. One noticeable absentee is any control over the direction that the lights shine in.
That is because each light is omnidirectional, meaning that they cast light in every direction from a spherical source. It goes without saying that this can be problematic with lights shining onto everything in range whether you want them to or not, making it much harder to control or create directional lighting on a subject.

There are also no proper shadows cast by the added lights when they are placed in the scene. Not only does this mean that they cannot be used to deliberately create shadows as a feature, but it can also make things look quite unnatural as light reaches places it really shouldn't.
Our brains instinctively know how light behaves, so it can be quite jarring to see an effect that just isn't right. It doesn't mean that the lights aren't useful, simply that they require careful use and sometimes even a little disguising to get a natural look.
"There are no proper shadows cast by the added lights when they are placed in the scene..."
Creating Directional Light
Despite those limitations, it is still possible to create directional lighting. In fact, one of the apparent drawbacks can even be used to your advantage here.
A typical 3-point setup for a portrait might use a relatively strong key light as the main light source, a less powerful fill light to balance the opposing shadows, and a high intensity back light to add a rim light effect around the subject. Doing this in open space is no real problem. Just place lights where needed around the subject and tweak their intensity to get the right balance of illumination.

The real trouble starts when the wanting to light a character that is in a tight space with other objects and walls nearby. The omnidirectional lights will illuminate everything near them and can completely ruin the shot by doing so.
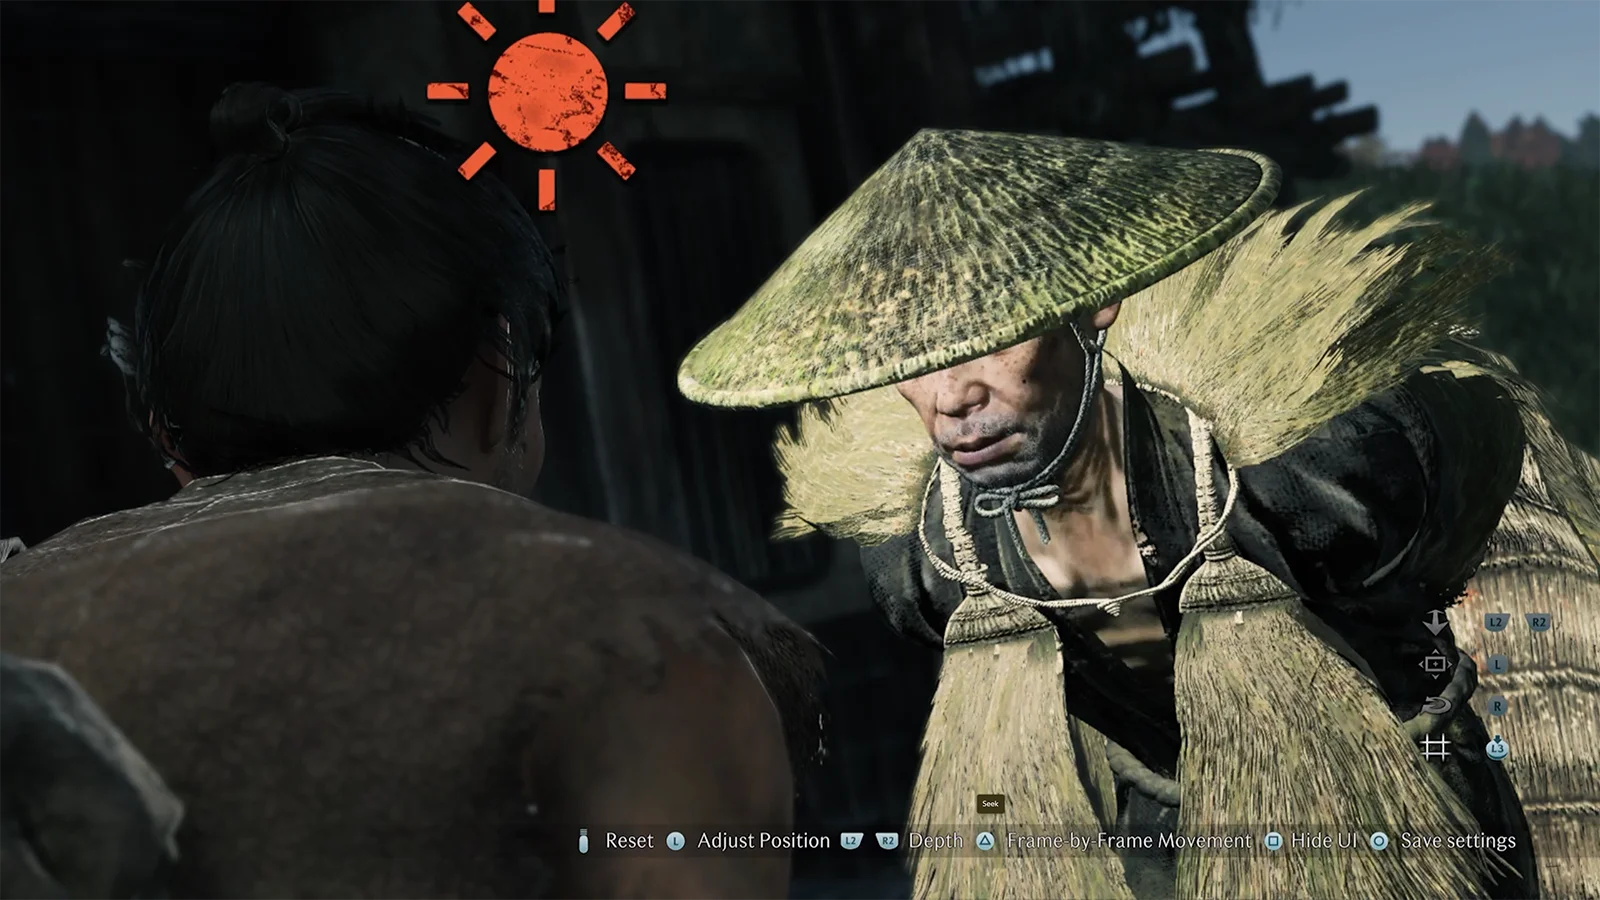
This is where that ability for the lights to pass through walls and even continue to shine onto objects on the other side of them turns into a positive. It's totally unnatural behaviour, but it becomes a surprisingly useful workaround in the absence of any directional spots.
To demonstrate, as this light is pushed beyond the wall that is close to the character, it is no longer illuminated from the side we can see, so removing the unwanted effect of a bright and distracting wall. Notice though that the light still manages to shine onto the character as intended.
There are no guarantees with this technique, but it is often possible to use walls and objects in this way to mask some of the effect of the light and create the illusion of a more sophisticated setup. It even works through floors.
It might mean that you'll need to move the light further away to hide it while still catching the right angle, in which case try increasing the intensity to compensate. Ultimately, it doesn't matter what happens where the camera can't see, so just focus on the results and this is a trick well worth trying.


Subscribe to the regular newsletter for all the latest features from TheFourthFocus.com


I really enjoyed reading your Rise of the Rōnin Lighting Guide! The photo mode features sound fascinating, especially the 3-point lighting setup. I'm curious to see how it compares to other games. Compress Image To 200KB would be a great tool for sharing these beautiful shots online.
If you're capturing and sharing your best screenshots online, having a reliable internet connection is key. I've seen some feedback about h2o wireless https://h2o-wireless.pissedconsumer.com/customer-service.html that might be useful if you're looking for an affordable plan to stay connected while uploading your work or streaming tutorials. A solid connection makes sharing your creative projects much easier.
The colorful visuals and lively audio design make Sprunki Retake stand out. Every new sound adds personality to your composition, turning each track into something uniquely your own.
Need reliable research proposal help services? Their experts offer personalized support, topic selection, and high-quality writing tailored to your academic goals. Get professional assistance for a successful proposal submission.
Don’t let writing assignments overwhelm you—BookWormLab.com is here to help! They offer expert assistance with essays, research papers, and more. Their professional writers ensure originality, quality, and timely delivery. Whether you need a full paper or just editing support, they’ve got your back. Take the stress out of academic writing and focus on what truly matters in your studies!