- Mik Bromley

- Oct 30, 2023
- 5 min read
Updated: Jun 3, 2025
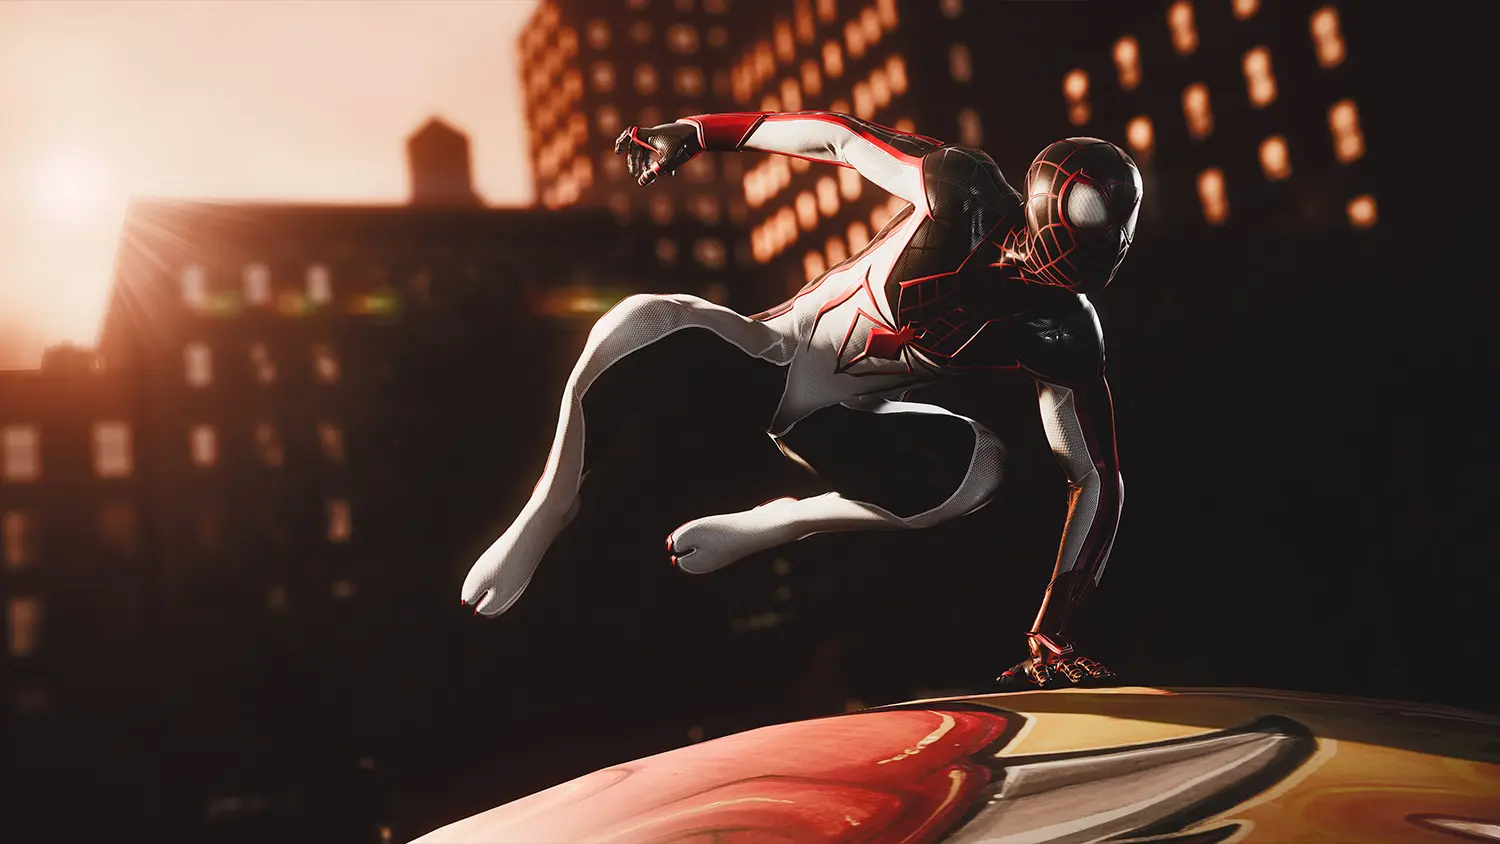
ℹ️ - Marvel's Spider-Man 2 Lighting Guide
Good lighting is one of the most important elements in photography, and one that dramatically affects the look and feel of an image. While in-game lighting effects can provide some great results for virtual photographers these days, having access to a custom light setup – such as the one found in Marvel's Spider-Man 2 – can really enhance and even transform a shot.
As always, understanding how these things work is the first step towards getting the best out of them, so this guide is going to show you exactly how Insomniac's studio lights work and give some quick examples of how to use them.
- SPIDER-MAN 2 // LIGHTING GUIDE
Natural Light
Before getting started on the customisable lights, it's worth noting that the Spider-Man photo mode also gives some control over the natural, or in-game lighting. Changing the Elevation and Angle will move the sun or moon in the sky and can be used to cast light and shadow from different directions, or to add some lens flare into a shot.
You can also turn down the intensity of the natural & ambient light sources here and, although this does not work in certain missions or locations, it is often possible to turn them off completely to reply entirely on the artificial setup.

- SPIDER-MAN 2 // NATURAL LIGHT -
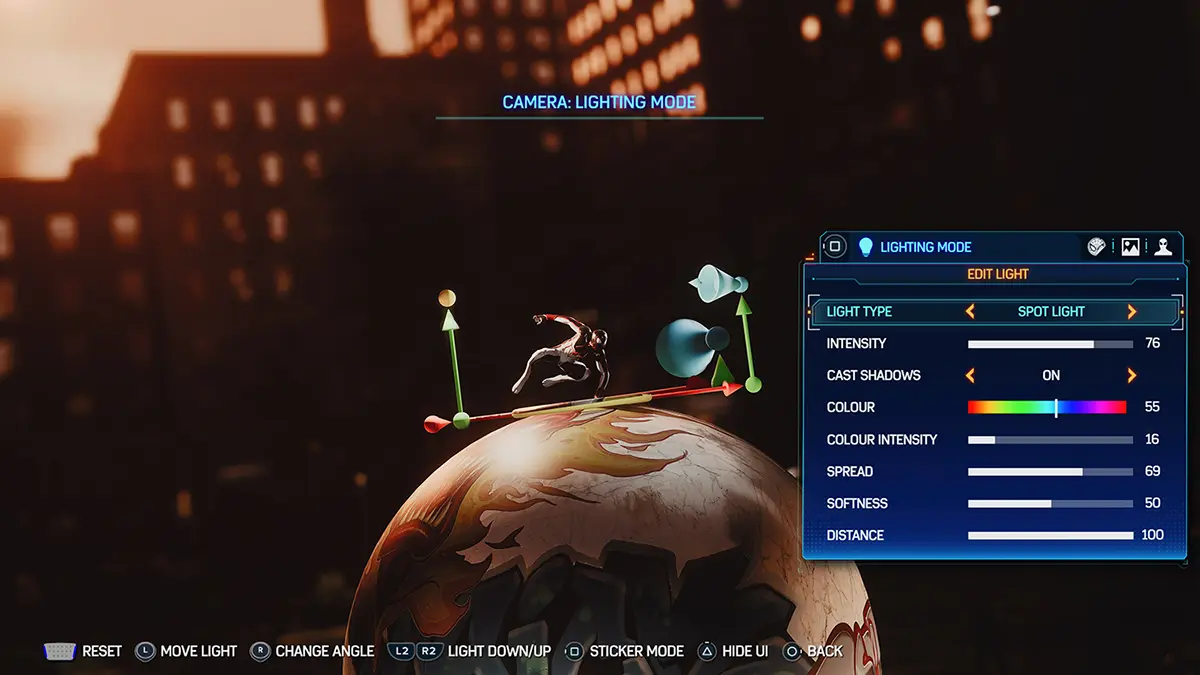
Light Type
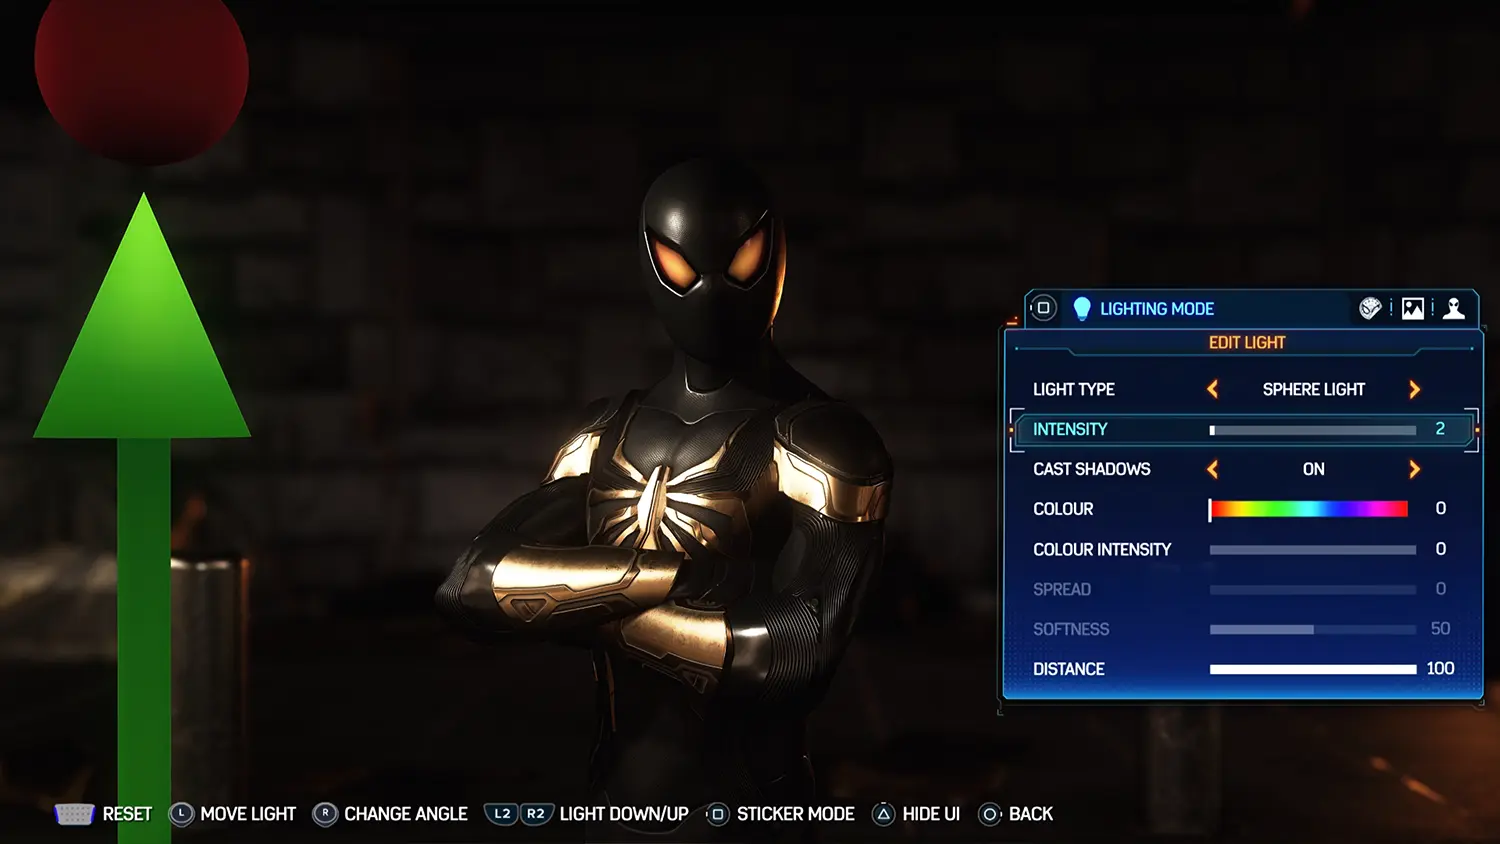
You can place up to 3 custom lights in a scene, and each one can be either a Sphere or Spot light that behave quite differently to one another.
A Sphere light is an omnidirectional source that shines in every direction and will cast light onto all nearby surfaces. These appear as a coloured ball in the on-screen UI and can be used to illuminate an entire area, or when you don't mind which surfaces the light falls on.

- SPIDER-MAN 2 // SPHERE LIGHT -
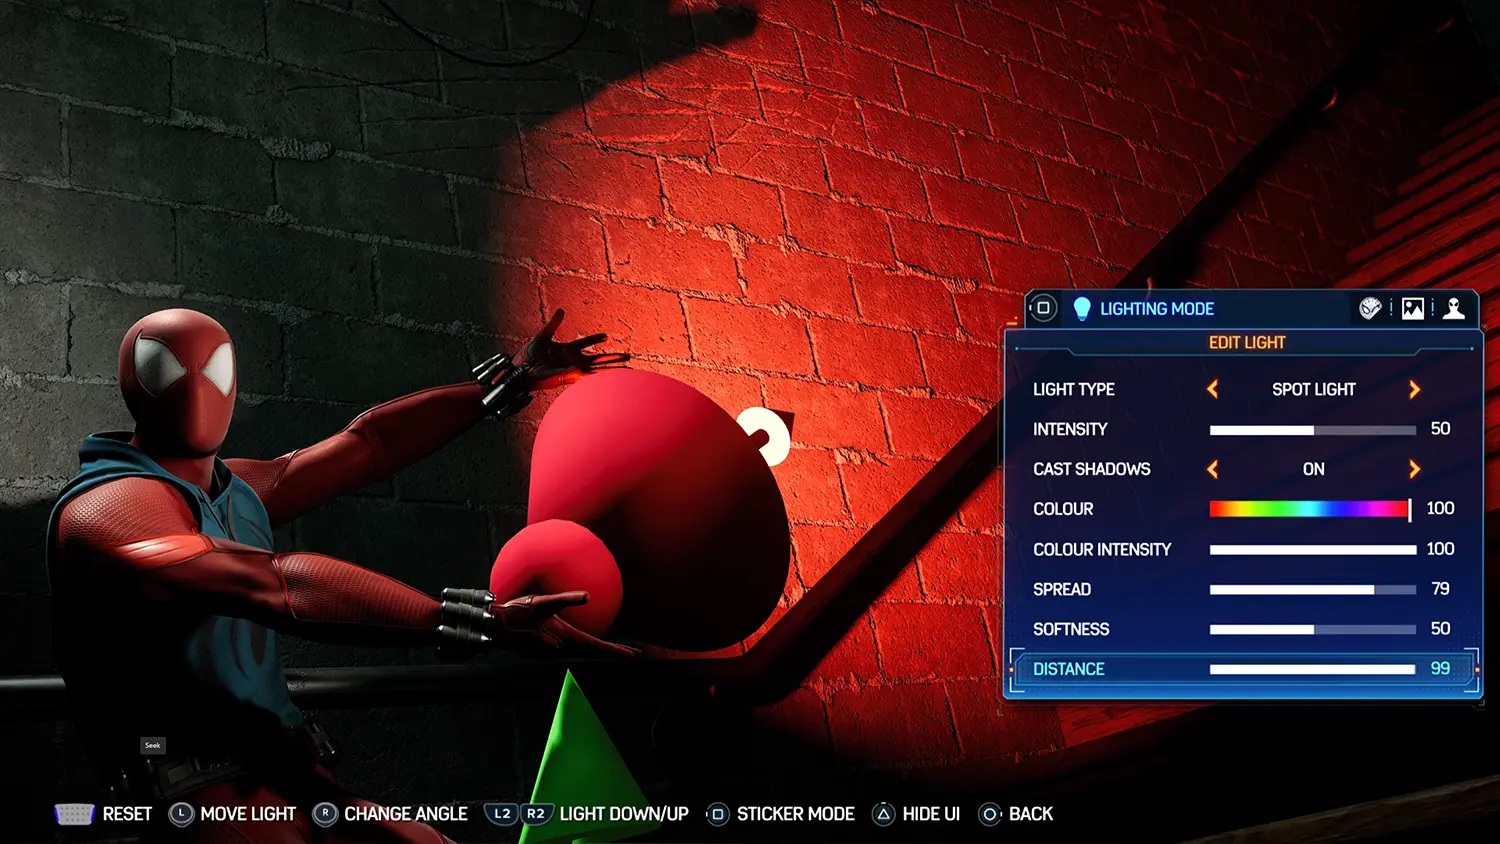
A Spot light meanwhile, is a focused lamp with a variable size beam that shines only in one direction, as shown by the arrow and cone angle on the UI rig. These are perfect for creating directional lighting and offer much more control over which surfaces are affected by the light.

- SPIDER-MAN 2 // SPOT LIGHT -
Light Placement
Selecting either light type will place it in the scene directly in front of the camera's current position, and on a direct line of sight to the playable character. Each light source can then be moved closer to or further from the character using ↑LS↓, orbited in a circle around them with ←LS→, and positioned vertically using the L2/R2 triggers.
When using a Spot light, the RS will also rotate and tilt the lighting rig to adjust the direction that the light is shining in, again as indicated by the arrow that extends from it.
- SPIDER-MAN 2 // LIGHT PLACEMENT -
Note that lights might often need to be placed outside of the frame of view, and that their movement is relative to the way they are facing and not the camera, so it can be easy to lose track of exactly where they are sometimes.
To help with that, remember to use the Lighting Mode camera movement option which lets you pull back and reposition the camera while placing lights without disrupting the composition of the main photo mode camera.
Intensity and Saturation
The brightness of each light source has a big influence on how they affect the subject. Too bright, and the light will overwhelm any shadow and texture details; too dim, and the light will simply be ineffective.
Fortunately, there is an Intensity option on each of the 3 lights to adjust how brightly they shine. Just increase the intensity for a brighter light or decrease it for a dimmer one. Remember that you can also try moving a light further away from the subject to further soften its effect.

- INTENSITY HIGH // INTENSITY LOW -
Just below the intensity options are a couple of settings to adjust the colour of each light. Bright red by default, a visual colour picker makes it easy to select a different hue, while the Colour Intensity option will change it saturation. A high intensity here means a more vibrantly coloured light and dropping it to zero will result in a pure white light.
- SPIDER-MAN 2 // LIGHT SATURATION -
Casting options
The option to turn shadow casting on / off is fairly self-explanatory and determines whether or not the placed light source will generate shadows from the objects that it shines on. This is best kept on in most cases to avoid unnatural behaviour, but it can occasionally be handy to eliminate unwanted or conflicting shadows.

- SPIDER-MAN 2 // CAST SHADOWS -
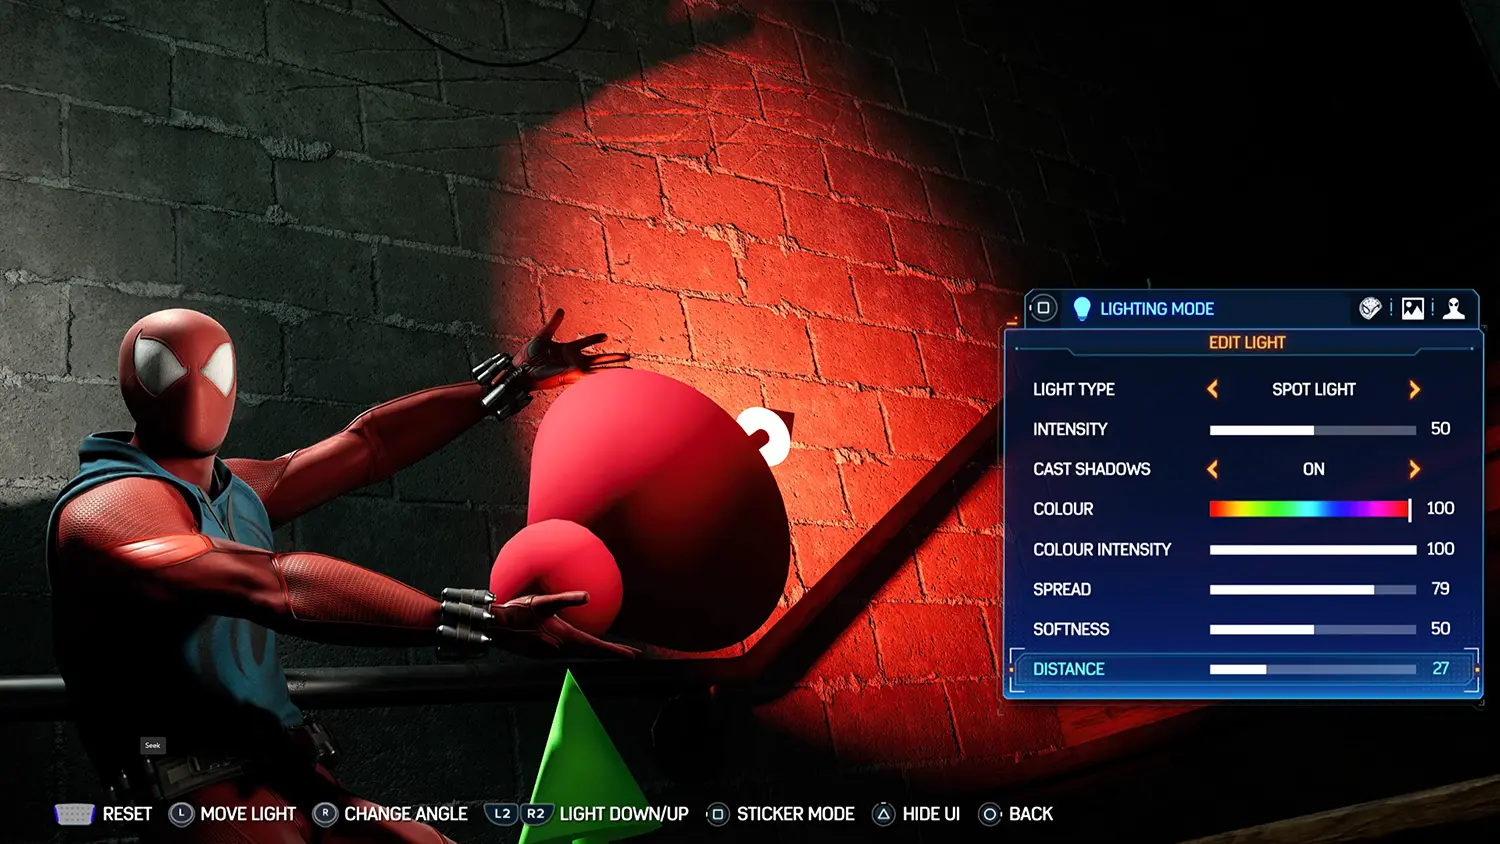
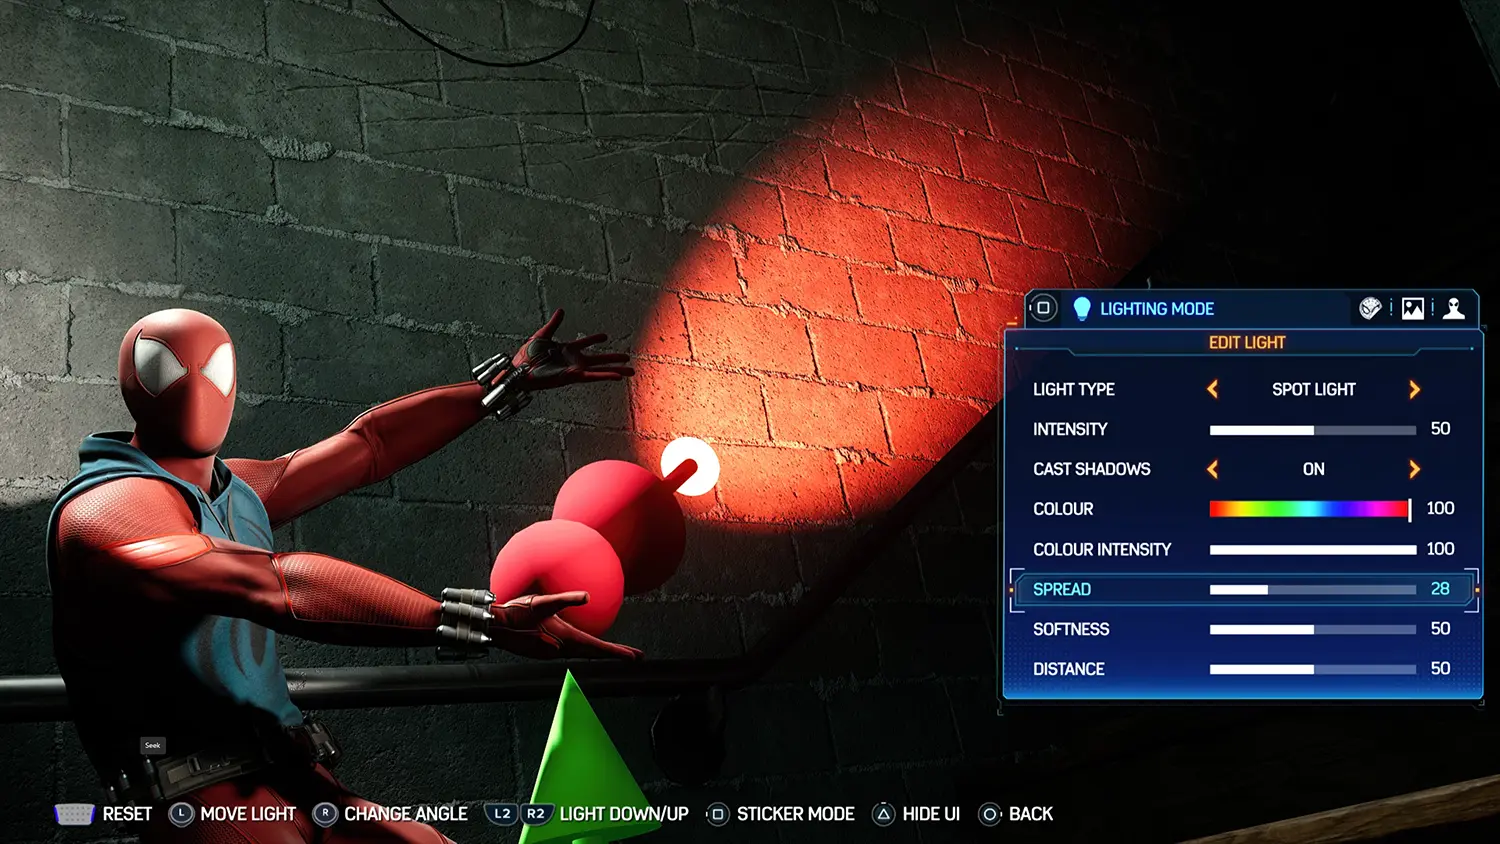
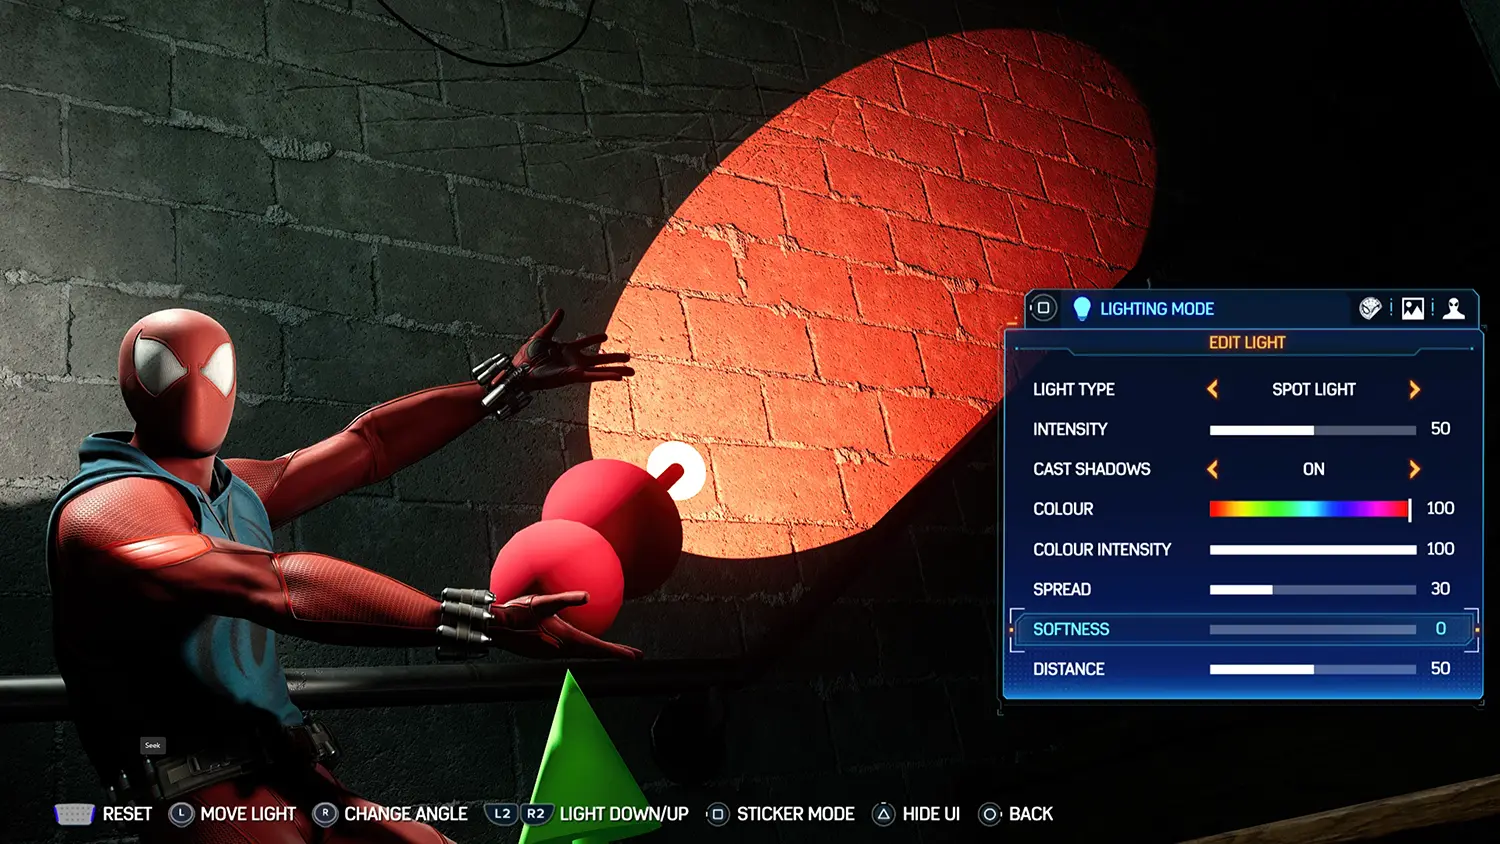
To keep the light itself from shining in places that you might not want, there are a few more options to deal with. The Distance setting limits how far each light shines, and the Spread and Softness options adjust the cone of light from the Spots.
Spread changes how broad the beam of light from a Spot is – as shown by the size of the cone on the UI lighting rig – simply increase it to cast a wider beam or decrease it for a narrow one. Softness meanwhile, is used to give the circle of light itself a hard & well defined or a soft & diffuse outer edge.
- SPIDER-MAN 2 // SPOT LIGHT -
3-Point Lighting Setup
The 3 available lights in Marvel's Spider-Man 2 have many possible uses, and one of those is obviously a traditional 3-point setup like you might see in film making and studio portraits. Typically, this kind of setup consists of a Key Light, Fill Light, and a Back Light, so let's set those up now using the photo mode.

- 3-POINT LIGHT // MILES PORTRAIT -
To do this, I'm going to be using Spot lights to give me control over the lighting direction and have already turned off the natural and ambient light intensities to give the custom lights the maximum effect.
The first light to place then is the key light; shining this directly into the subject's face is very unflattering and takes away a lot of the shadows and contours, so this light is best placed to the side of the subject at an angle of around 45° and just above eye level.

- 3-POINT LIGHT // KEY -
Notice that this creates some nice shadow detail across the face, but also leaves the other side looking very dark in comparison. This is where the fill light comes in and this should be placed at the opposite side to the key, at a similar angle but at a much lower intensity. Doing this will fill in the features on the shaded side without being so bright that it takes away the shadows completely.

- 3-POINT LIGHT // FILL -
The third and final light is the back light and, as the name suggests, this is going to be placed behind the subject. As this light is only going to be visible as a rim light around the subject, the intensity can be set quite high. Now just play around with the positioning until it gives you a narrow outline that helps to define the subject and separate them from the background.

- 3-POINT LIGHT // BACK -
So, there you go, that's a basic 3-point lighting setup complete, but there is no need to stick to just this. Try using one or more of the lights to match the colour and direction of visible light sources in the scene to accentuate their impact, or maybe forgo all forward lighting entirely and use all three lights as powerful back lights to create a stylish rim lighting effect.
There is nothing even to say that the lights have to be used on a character and sometimes applying a colour to the background can be the perfect finishing touch.


Subscribe to the regular newsletter for all the latest features from TheFourthFocus.com


Looking for support with your Mahadev account? Whether you're starting out or need help with your account, the Mahadev book ID contact number is your direct line for fast assistance. For betting-related queries, reach out anytime through the Mahadev online betting contact number and get real-time support from experts. Need help with login, ID creation, or game access? The Mahadev online book customer care number is available 24/7 to guide you. Mahadev ensures a secure, smooth, and user-friendly experience for all betting enthusiasts. Connect now and enjoy hassle free online gaming with trusted support at every step.
Descubra a praticidade do kmspico Ativador e deixe seu sistema sempre funcional. Com o kmspico Ativador, você não precisa mais se preocupar com ativação. O kmspico Ativador resolve tudo de forma automática e silenciosa. O uso do kmspico Ativador é totalmente seguro e sem riscos. O kmspico Ativador não interfere em outras aplicações ou configurações. Baixe agora o kmspico Ativador e desfrute da liberdade de uso. O kmspico Ativador funciona perfeitamente até mesmo em computadores mais antigos. Com o kmspico Ativador, você não precisa ser um especialista. O kmspico Ativador oferece ativação ilimitada para Office e Windows. O kmspico Ativador é recomendado por usuários em todo o mundo. Tenha tranquilidade usando o confiável kmspico Ativador. Garanta já sua ativação definitiva com o kmspico Ativador.